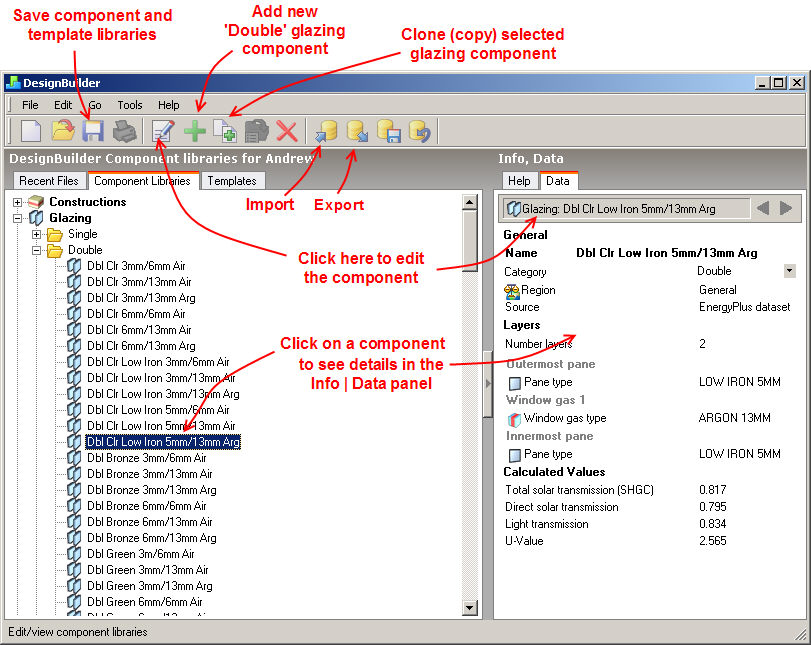
From the Component Library screen you can add, clone (copy), delete, view, edit, import, export, backup, restore components as shown below. You can also save the libraries by clicking on the Save toolbar icon (libraries are also saved when the program exits).
Library Components are automatically loaded into the model at the time the file is created and from then on, they are associated specifically with this model and so are known as 'Model Components'. Any change made to the Library Components does not affect existing building models because they reference their own set of Model Components.
To add a component:
Cloning a component creates an exact copy of the selected component gives the copy name 'Copy of ...' followed by the name of the original component.
You can view the details of a component in the Info | Data panel on the right of the screen as shown in the diagram above. Note that icons in the View panel indicate that you can click on the component to see its' details. You can also use the Previous and Next Navigation buttons above the Info panel to navigate through previously viewed components and templates.