 Detailed HVAC Example - Bulk Edit Fan Settings
This example shows how to edit the properties of all fans in a Detailed HVAC model.
-
Either load an existing Detailed HVAC model with multiple fans included, or create a new model with several zones, set the Detailed HVAC model option and load the "FCU 4-Pipe, Air Cooled Chiller" Detailed HVAC template for all zones.
-
Click on the Model data grid view toolbar icon to open the main Management dialog.
-
Select the HVAC tab at the top to view the HVAC Layouts.
-
Tick the Show only HVAC components present in the model checkbox to help you find the relevant HVAC Layouts.
-
Select the "Fan" Layout from the list.
-
Click on the Edit button to load the fan model data to the grid on the main Model Data Grid View dialog.
-
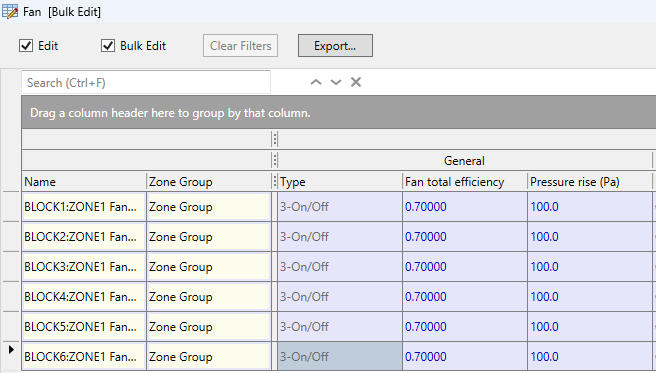
If you loaded the "FCU 4-Pipe, Air Cooled Chiller" Detailed HVAC template you will notice that all FCU fans have a Pressure rise setting of 100 Pa.
-
Select the fans you would like to edit using the mouse together with the <Ctrl> or <Shift> keys and then check the Bulk Edit checkbox. This causes the selected rows to turn blue/mauve as shown below.
-
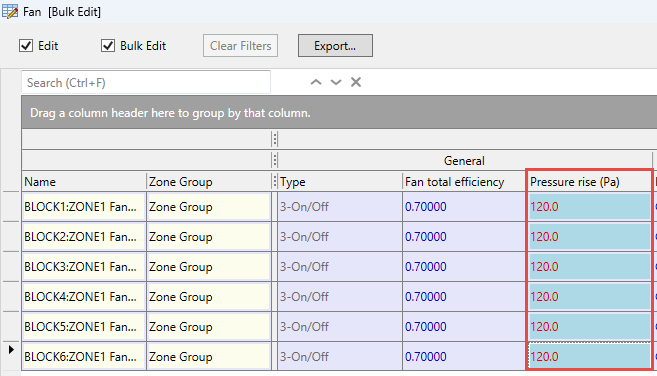
Change the Pressure rise for one of the fans to 120 Pa and press <Enter>.
Note that all same change is automatically applied to all selected fans as shown below. Changed cells are shown with a turquoise blue background.
-
Once you have finished making changes click on the Apply button on the top right of the main grid to save your changes and close the dialog.
Note: The above bulk edits could perhaps be made more easily using the Target tab on the Fan dialog for one of the fans, requesting the changes to be applied across the equivalent fans in the same HVAC zone group. However, for larger models with multiple zone groups or AHUs the MDGV method is generally be the most efficient way to make bulk edits.