![]()
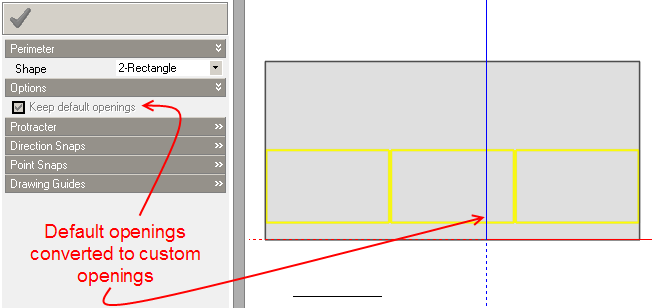
Before activating the Draw window tool, you are given the option of keeping any default surface openings through a check box in the Display options dialog. If you choose to keep these openings, they will be converted to custom openings and so will not be subsequently affected by any changes to the facade attribute data and must be deleted or edited manually, or cleared back to default openings.
 See the Drawing Openings on Surfaces Tutorial
To add a window to a surface, click on the 'Draw window' tool. If you have opted to keep the default openings, they will be converted to custom openings:
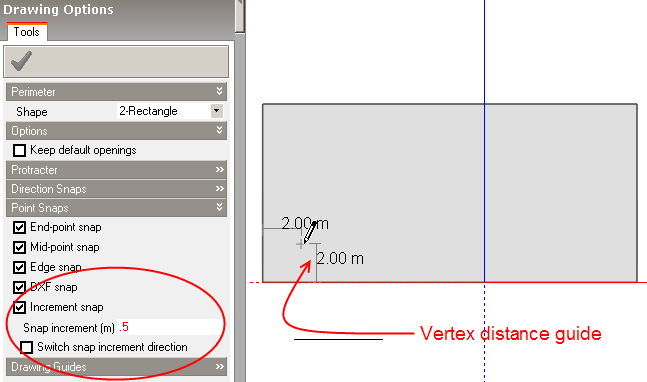
On the other hand, if you un-check the 'Keep default openings' option, all default openings will be removed. Select the perimeter shape that you require and then move the mouse cursor to place the window origin. As you move the mouse cursor over the surface, distance guides will be displayed from each of the surface vertices to help in placing the window origin. If the increment snap is switched on, the origin will snap in increments from the vertex that's nearest to the mouse cursor:
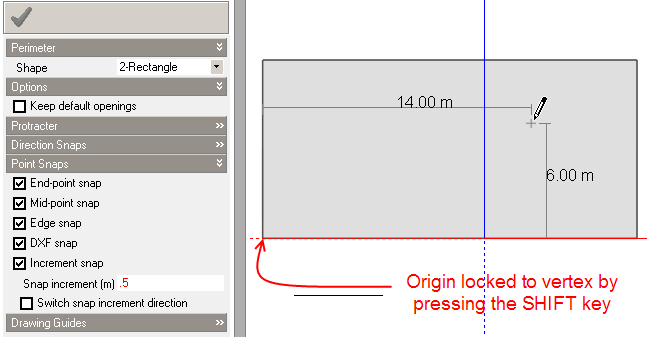
You can lock the origin to a particular vertex by moving the mouse cursor close to the vertex and pressing the SHIFT key and keeping it pressed until you actually place the origin. This can be helpful if you want to place a window relative to a vertex at the other end of the surface:
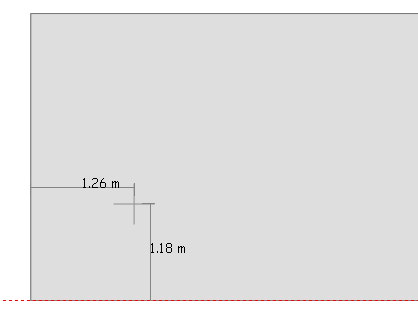
Having placed the window origin, you can then draw the window using the selected perimeter drawing mode, for details of drawing perimeters please refer to the Perimeters section.
You can type in the precise dimensions and offset from the origin of your window using 'Key Ins'. The procedure is:
1. Start the 'Draw window' command as described above.
2. Define the window position relative to an origin by first moving the mouse cursor to define the origin (typically the bottom left corner of the surface)
3. Then type in the offset of the window origin (bottom left corner of the window in this example) in the format x y. Note that there is no comma between the x and the y coordinates.
The coordinates that you type in will appear under the 'Key In' header in Drawing Options panel. The convention used when positioning and drawing openings at surface level is that x increases from left to right and y increases from bottom to top. This is true whether viewing the surface from inside or from outside.
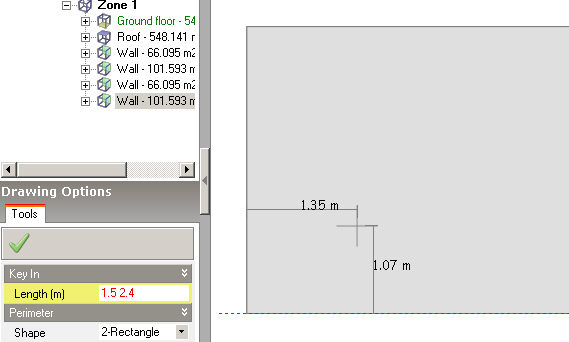
4. Then press <Enter> to define the window origin.
5. Next type in the window width followed by a space followed by the window height. Again the coordinates you type in are shown in the Drawing Options panel. In the example below a window is being defined having width 2m and height 1m.
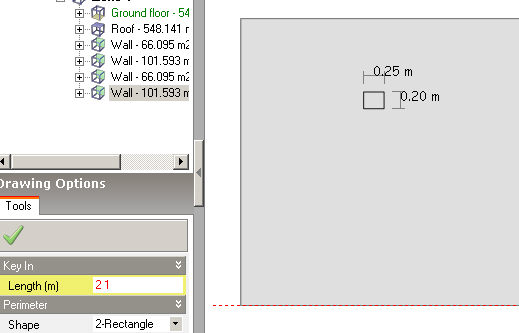
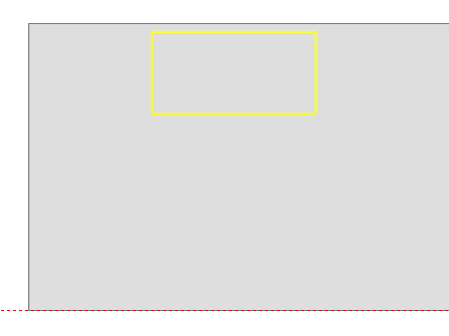
6. Press enter to create the window:
You can use the mouse in conjunction with Key Ins if you prefer. So you could use the mouse to define the window offset from the origin and then use Key Ins to define the window dimensions or vice versa.
Tip: You can also enter negative x and y values when keying in offset and coordinates.