Dialogs tab of the Program options dialog
Check this option if you prefer DesignBuilder to automatically start calculations (typically opening the calculation options dialog first) when you move to a new calculation tab. For example when you click on the Simulation screen and there aren't any results available to display yet, by default DesignBuilder shows the Update button, giving you opportunity to update the results. However if you activate the Auto calculate program option, DesignBuilder will instead open the Simulation calculation options dialog. This was the default behaviour in v5.1 and earlier, but in v5.2 and later it is necessary to click on the Update button to start a calculation.
These options control whether a calculation option dialog appears by default before every calculation. Note that a dialog always appears when you press Update.
When you create a new site (project), a dialog box appears by default allowing you to enter basic data on the new project. If you prefer not to see this dialog in future and just use default data, uncheck this checkbox.
When you add a new building, a dialog box appears by default allowing you to enter basic data on the new building. If you prefer not to see this dialog in future and just use default data, uncheck this checkbox.
When you export data (typically by clicking on the Export toolbar icon) there are 3 options for the destination of the report. You can define which option you most frequently use by choosing from one the available default options:
There are some options for the calculation of the U-value ISO 6946.
You can choose to fix the mean gas temperature to 10°C which is the requirement for strict adherence to ISO 6946. Unchecking this option allows the gas temperature for each gas layer to be calculated individually for a more accurate estimate of gas conduction (and hence the glazing U-value) to be calculated.
You can define the outside air temperature to be used as boundary conditions in the calculation of glazing U-value. The outside air temperature should be 0°C for strict adherence to ISO 6946 .
You can define the inside air temperature to be used as boundary conditions in the calculation of glazing U-value. The inside temperature should be 20°C for strict adherence to ISO 6946 .
By default in Detailed HVAC when you edit an HVAC zone equipment object, such as an HVAC zone, a FCU a chilled ceiling or a sub-component within zone equipment such as a zone heating coil, any changes made on the dialog apply only to that object. That is 1-This HVAC Zone only is selected by default on the Target tab of the dialog. However you can use this selection to choose a different default option allowing changes made to be saved to the equivalent component in all HVAC zones in the group by default if that is what is required. Options are:
When an HVAC zone is added to an HVAC zone group, default values are taken from the HVAC zone group. This default HVAC zone group data is normally hidden because it can confuse new users who expect changes made to HVAC zone default settings on the HVAC zone group dialog to be inherited by child HVAC zones.
This option allows more experienced users who understand that the HVAC zone group defaults are only used at the point when the HVAC zone is added to the group to control defaults. It is switched off by default.
Tip: The most important application of HVAC zone group default data is when saving HVAC templates where specific HVAC zone settings are required. Any HVAC zone settings made in the source model are not saved with an HVAC template, but the settings on the HVAC zone group are saved and applied to zones added to the HVAC zone group when the template is subsequently loaded in the destination model.
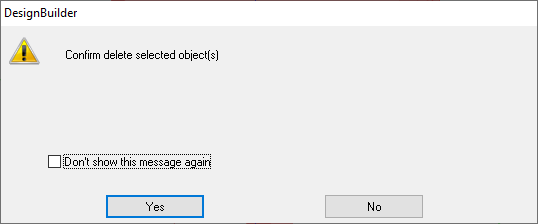
Check this option if you would like DesignBuilder to prompt you to confirm before deleting any objects in the model. You may need to use this option if you have previously checked the checkbox on the delete object dialog (below) and would now like to change back to the default behaviour of confirming before deleting.