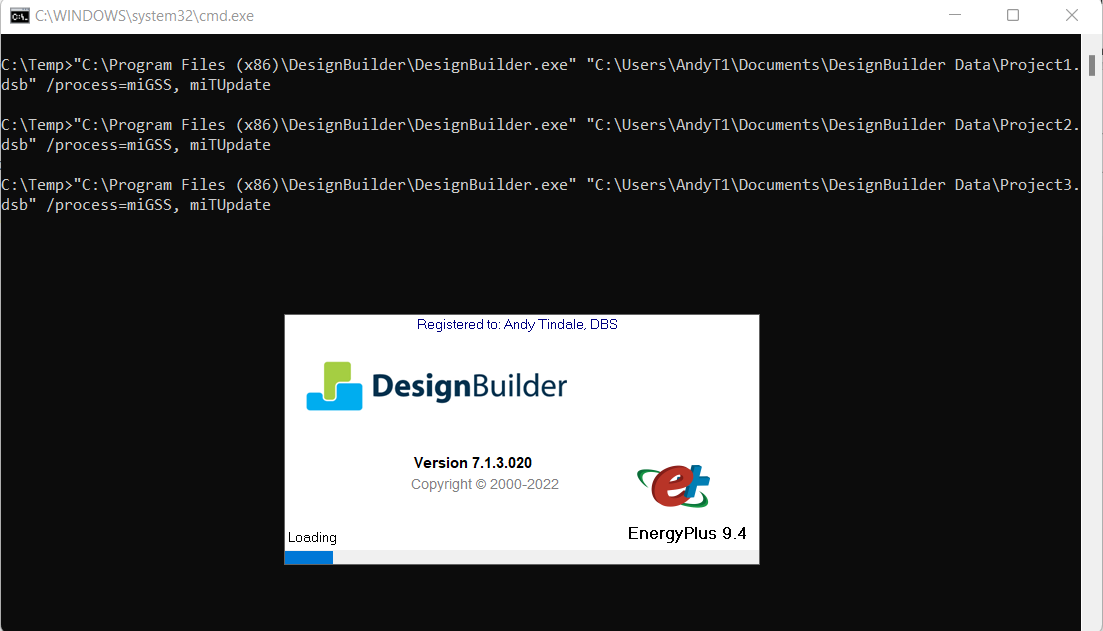
Models can be opened and processed in a variety of ways via the command line. This can be useful for batch processing multiple models.
The command line syntax is:
“DesignBuilder” “MyFile” /process=ListOfProcesses
Four key points need to be considered when working via the command line:
The table below lists the command line processes that can be executed on an open DesignBuilder model.
| Command | What it does |
| miGSS | Changes the view to the simulation screen |
| miGHL | Changes the view to the Heating Design screen |
| miGHG | Changes the view to the Cooling Design screen |
| miGDY | Changes the view to the Daylighting screen |
| miGCalculate | Changes the view to the SBEM/DSM Calculation screen |
| miGCFD | Changes the view to the CFD screen |
| miTUpdate | Runs the calculation for the current screen. Generally, this command should be placed last on the line, before any ChangeAttributeValue commands. |
| TabChange_n | Changes the view to tab n on the current screen. e.g. TabChange_2 on the Daylighting screen will change the view to the Annual daylighting tab |
| SimStartDate d m | Sets start date to the numerically specified day and month. e.g. SimStartDate 4 5 sets the start date to May 4. |
| SimEndDate d m | Sets end date to the numerically specified day and month. e.g. SimEndDate 11 5 sets the start date to May 11 |
| ChangeAttributeValue AttributeName Value |
Changes the value of the specified attribute at building level for the currently selected building. As for attributes set in the UI, the inheritance of building level attributes down to block, zone, surface and opening levels is governed by DesignBuilder's normal inheritance rules.
Multiple ChangeAttributeValue commands can be included in a single “/process= string”. Multiple commands should be separated by commas, as with other process commands. For example, the following command prompt opens a named model, switches to the Daylighting screen, sets the Zone multiplier to 2 at building level, sets the Daylighting Simulation type to "4" (selecting the 4-LM-83-12 option) and finally, runs the daylight simulation:
"C:\Program Files (x86)\DesignBuilder\DesignBuilder.exe" "C:\<somepath>\shoebox.dsb" /process=miGDY, ChangeAttributeValue ZoneMultiplier 2, ChangeAttributeValue RMSimulationType 4, miTUpdate
Syntax for Attribute Values:
a. For numeric attributes, DesignBuilder stores values internally as integer codes. For example, to set 0-None in Openings> External Windows > Dimensions > Type, the command is:
ChangeAttributeValue Layout 0
b. For booleans, use 1 or 0 to specify True or False. For example, for “True” in Activity > Computers, the correct command is:
ChangeAttributeValue ComputersOn 1
c. For real numbers, just add the number with decimal separator if required. For example, for 0.5 in Activity > Occupancy Density, the correct command is:
ChangeAttributeValue OccupancyValue 0.5 Note: DesignBuilder stores real values using SI units and uses "." as the decimal separator. ChangeAttributeValue expects Value to be provided in the same native format, regardless of the Windows Region selected on your machine. d. For database table selections such as Schedules, Constructions etc. settings are made using a numeric Id, not the name of the item. Numeric Ids aren't available directly via the UI, but they can be obtained via the API, iterating over the table records to find the item by name. Once the correct record is returned, the Id can be read (the zeroth field in the record) and used to set the Id of the Schedule, Construction etc. using ChangeAttributeValue. Tip: To ensure you are using the correct AttributeName: |
| ExternalCommand_arg | Run an external command with optional arguments |
| ImportModelData_File path and name | Imports the model data stored in the defined file. The file must be a csv file previously exported from the model. |
| ImportLibraryData_File path and name | Imports the library data stored in the defined file |
| miFExportAsXML | Exports the model as a dsbXML file with the same name as the current model |
| UseSimManager | Use this argument to ensure the simulation is run using the Simulation Manager. The Server and EnergyPlus server method settings currently set in the model will be used - localhost and EnergyPlus respectively by default. |
| NoClose | Prevents DesignBuilder from shutting down after all commands have been processed |
"C:\Program Files (x86)\DesignBuilder\DesignBuilder.exe" "C:\<somepath>\shoebox.dsb" /process=miGSS, miTUpdate
Runs an EnergyPlus simulation and closes.
"C:\Program Files (x86)\DesignBuilder\DesignBuilder.exe" "C:\<somepath>\shoebox.dsb" /process=miGSS, miTUpdate, ExternalCommand_ProcessResults
Runs an EnergyPlus simulation, process the results in a custom standalone application called ProcessResults.exe and closes. In this case ProcessResults.exe must be either in the folder from which the command is executed or in a folder referenced by the Windows path list.
"C:\Program Files (x86)\DesignBuilder\DesignBuilder.exe" "C:\<somepath>\shoebox.dsb" /process= miGHL, miTUpdate, miGHG, miTUpdate, NoClose
Runs both Heating Design and Cooling Design calculations, then stops DesignBuilder from closing.
"C:\Program Files (x86)\DesignBuilder\DesignBuilder.exe" "C:\<somepath>\shoebox.dsb" /process= miGDY, miTUpdate, TabChange_2, miTUpdate
Runs both Illuminance and Annual daylighting calculations and closes.
"C:\Program Files (x86)\DesignBuilder\DesignBuilder.exe" "C:\<somepath>\shoebox.dsb" /process= miGCFD, miTUpdate
Runs the CFD simulation and closes. Whether this is simple or advanced CFD simulation depends on the model options previously set in Shoebox.dsb.
A convenient way to process a set of models is to run a script with multiple commands. This allows several models and/or several calculations to be run unsupervised.
Scripts can be set up in a number of ways including using Windows batch files and PowerShell and Python scripts.
The easiest way to set up a batch process for most users will be through a simple batch file. To do that follow the steps below.
1. Set up the DesignBuilder models you wish to simulate with the required model data and calculation options. Close DesignBuilder.
2. Create a batch file in a folder that you can easily navigate to from the command line.
a. For example create a folder from the root of C:\ drive called "DBBatch".
b. Create a blank text file in that folder called something like BatchRunDB.bat.
3. Copy the commands that you wish to execute into the batch file using a text editor such as Notepad. For example to run simulations for 3 models called Project1, Project2 and Project3 stored in the default Documents\DesignBuilder Data folder, the contents of the batch file might look something like this:
"C:\Program Files (x86)\DesignBuilder\DesignBuilder.exe" "C:\Users\MyUsername\Documents\DesignBuilder Data\Project1.dsb" /process=miGSS, miTUpdate
"C:\Program Files (x86)\DesignBuilder\DesignBuilder.exe" "C:\Users\MyUsername\Documents\DesignBuilder Data\Project2.dsb" /process=miGSS, miTUpdate
"C:\Program Files (x86)\DesignBuilder\DesignBuilder.exe" "C:\Users\MyUsername\Documents\DesignBuilder Data\Project3.dsb" /process=miGSS, miTUpdate
The above commands may wrap onto new lines when viewed in your browser, but in the batch file each command should be on 1 line.
4. Run the batch file, BatchRunDB.bat, by double-clicking on it in Windows File Explorer, or by typing "BatchRunDB.bat" on the command line and pressing <Enter>
5. The batch file will load each model into DesignBuilder in turn and execute the commands requested without any user intervention required. When the commands have all been executed for one model, DesignBuilder will save the model and close, returning control to the batch file.
In the above example, Project1.dsb is loaded, a simulation is run and when complete and the results have been loaded to the model the project is saved to disk. Then DesignBuilder closes. The same process is repeated for Project2.dsb and Project3.dsb. Once all commands have been executed the batch process is complete and the requested results will be stored in each of the models.
6. To retrieve the simulation results, open the processed dsb files in the usual way.
Tip: If you wish to continue to use your computer while the batch process runs, it can help to minimise the DesignBuilder main window so that it doesn't keep grabbing focus each time a new model is loaded.
In DesignBuilder v2025.1, after running a command line process, the software remains open and must be closed manually using the Task Manager:
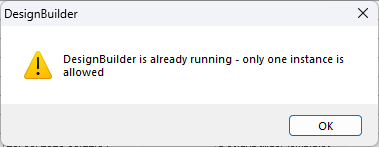
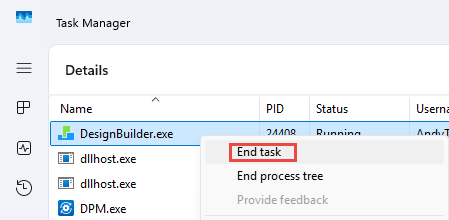
This issue will be addressed in a future version.