The format used by EnergyPlus to define the "reports" (output data) required is described below.
A single "report" can be thought of as a single set of output data or alternatively as a line of data on a graph and is defined using a single line of text using this syntax:
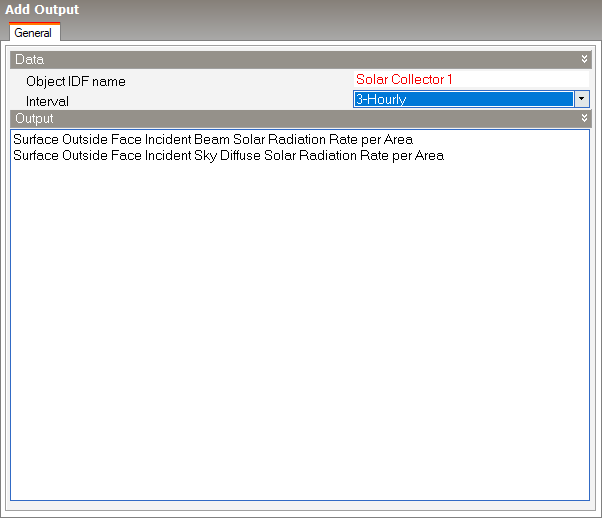
Output:Variable, <Object name>, <Report Name>, <Interval>
- Output:Variable is an IDF keyword which indicates that what follows is a request for output data.
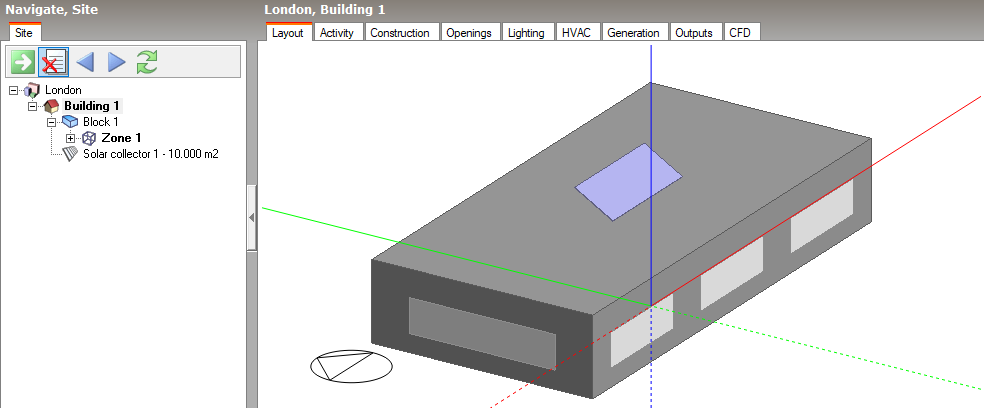
- <Object name> is the name of the object for which data is required, e.g. the zone or the HVAC component name. In some cases it is possible to enter "*" to indicate that the data is required for all relevant objects (e.g. all zones).
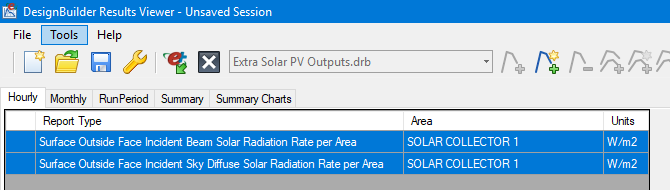
- <Report Name> is the name of the report (output data) required. Thousands of reports are available in all and you should refer to the EnergyPlus help file for details on what is available.
- <Interval> should be one of the following keywords:
- Monthly
- Daily
- Hourly
- Timestep - corresponds to the sub-hourly interval in DesignBuilder terminology.
- Detailed - a special interval provided by EnergyPlus where detail down to the level of the HVAC timesteps can be provided. the actual intervals reported will often vary during the simulation, but it can at times provide useful debugging information.
For example to generate a new hourly data set for the "Time Heating Setpoint Not Met While Occupied" report for the zone having IDF name "Block1:Zone1" add this line of text to the IDF file:
Output:Variable, Block1:Zone1, Time Heating Setpoint Not Met While Occupied, hourly;
To generate sub-hourly data on the activity of the ideal loads economiser for all zones use:
Output:Variable, *, Ideal Loads Time Economizer Active, timestep;
Note the use of the "*" character to mean all objects and the semi-colon at the end of the line. For further clarification on how to specify requests for EnergyPlus outputs you can refer to the Output:Variable data provided by DesignBuilder in previously generated IDF files.
The above is just one way of obtaining outputs. Once familiar with EnergyPlus reports you can be creative with use of additional IDF to request further outputs.